
Thursday, August 18, 2011
Friday, July 1, 2011
Lovely Vintage Button Bracelets

Double Strand Vintage Buttons and Pearls Bracelet with clasp with pearl dangle pictured at top.
Single Strand Vintage Buttons and Pearls Stretch Bracelet at bottom back.
Big Vintage Buttons Cuff Style Bracelet with loop clasp at bottom foreground.

Tuesday, June 14, 2011
Creative Life Featured

I'm honored that ArtfulExpress Creative Life was featured as Pick of the Day for "Links We Like" on the great site Poetry Here and Now by Briged Briton.
Briged says "Cool Found Materials' Artwork. Check it out for Inspiration -you'll be diving into your recyclables before you know it, for art supplies!!"
Be sure to follow Poetry Here and Now on twitter as well :-)
Briged says "Cool Found Materials' Artwork. Check it out for Inspiration -you'll be diving into your recyclables before you know it, for art supplies!!"
Be sure to follow Poetry Here and Now on twitter as well :-)
Tuesday, June 7, 2011
It's Your Choice


Protect our Earth now, or Rest in Peace for Eternity. Two-sided hanging 'EcoSculpture' made from all recycled items.


Saturday, June 4, 2011
LED Tealight Candle Toppers

Decorative topper made from upcycled plastic bottles. Place on top of a LED Tealight Candles as lovely table decorations for your evening outdoor room, patio, pool or deck party. Place in a shallow clear plastic cup for a floating candle for your evening garden pond. Or use as favors with each place setting at a child's or teenagers birthday party. The candles can be purchased at a dollar store making them an inexpensive but interesting gift that the guests can take home.

Close-up view of curled tendrils around top of decoration, which are lightly illumenated by the flickering candle in center. This example is clear plastic, but some are made from colored bottles, or painted with transparent glass paint for different effects. No two are exactly alike, but the use of the same technique while forming them and color coordinating will create matching sets.

View from the top of the curled edged cup, with the rays and candle light at base inside the cup.
Wednesday, June 1, 2011
ArtfulExpress Photo Featured on Popular Blog

I'm honored to have the above photo featured in connection with a great post "Game of your life - Destiny Cards" by my friend Rachana Shakyawar on her fantastic Humming Today Blog. Be sure to check out the rest of her post's as well. Her creativity and optimism is inspiring. Thanks, Rachana, for the collaboration and kind words! Your writings and personality have touched my spirit. :-)
Sunday, May 15, 2011
Baskets fashioned from Upcycled Materials

I've been experimenting with making baskets entirely from magazine pages and paper towel tubes and a little glue. These decorative baskets have a more open structure, but are very sturdy and functional. I will be working on more designs, some with more solid sides, lids etc. I have lots of ideas to try. Once I have a few more made, I will put a coat of varnish on them all.

Thursday, May 5, 2011
Angels for Mother's Day
 ("My Mom is an Angel cuz she...is funny, cooks good, is pretty cool, gives nice hugs...")
This is an easy craft for kids to make for a Mother's Day gift from items found around the house. This one uses all recycled items except clear sticky tape, kids glue stick and maybe the bits of yarn or string.
One child could craft the whole thing, or each child could make their own angel and tag to add to the sign. The sign could say "My Mom is an Angel cuz she..." or "Happy Mother's Day from your Little Angels". Just leave enough space at bottom of the sign to glue the angels in place.
A tissue box was cut for the sign at top and the tags hanging at the bottom of the angels, but any stiff paper or cardboard would do.
The writing here was created from seperate letters cut from magazines, junk mail or ads, which were then glued in place. But your child could write the words with crayon or magic marker on a lighter colored paper and it would be just as adorable, and probably much easier.
The angels here are made from the lift off portion of a Dunkin Donut's coffee cup lid, with a white button, cut out white cardboard circle, or anything else that would work for a head. But for a younger child you could easily cut the entire angel shape from paper instead of making the more complcated version. If using paper cutout angels, you can skip the next two steps.
Use a narrow strip of the cardboard, cut to go up the entire back of the angels' body to an inch or so above the head. Place the cardboard strip on the back of the angel, centering it so it doesn't show from the front, then place a piece of tape across the entire wing area to hold the cardboard in place.
Glue or tape the head to the cardboard strip just above the 'wings' then take a white plastic ring that seals the cap of a pop bottle and place it over the cardboard strip to just at the top of the head for a halo and fasten it by folding the excess cardboard strip to the back, over one side of the ring and secure it with tape from the top of the head and down a portion of the body. Trim any excess tape that shows from the front. Or make a white paper halo out of a small strip of paper with the ends glued together and then glue it to the excess cardboard at the top of the head, trimming the cardboard off just above the halo.
Draw a face on the angel with magic marker and then glue the head of the angel to the bottom portion of the sign. Set it aside to dry. Then use a paper punch to make a hole at the foot of the angel to thread string or yarn through to hang a tag from. And punch two holes at the top of the sign for string to hang it with.
Cut a tag out of paper or cardboard, punch a hole at the top end and have the child put a short message to mom on it, such as something she does that makes her an angel, or a message of love or thanks from her little angel.
Loop a string, or yarn, through the holes at the foot of the angel and the tag, leaving the tag hang a little loosely and tie a knot to fasten the tag in place. Finally, tie a string loosely from one hole to the other at the top of the sign to hang it with.
Wednesday, April 27, 2011
Fun Bangles from all Upcycled Materials

These Bangle Bracelets (which are in this spring :-) are made from plastic jars cut into rings, scraps of shopping bags left from other projects, buttons and beads saved from no longer used garments.
They are very light and flexible making them very comfortable to wear.

These Bangle Bracelets (which are in this spring :-) are made from plastic jars cut into rings, scraps of shopping bags left from other projects, buttons and beads saved from no longer used garments.
They are very light and flexible making them very comfortable to wear.
This Blog Featured on Blog Awards at makingjewelsupplies.com
Featured Blog
Artful Express Creative Life
A place to explore creativity and bring it into our...
Click here: Blog Awards
http://makingjewelrysupplies.com/index.php?cont=contact
Tuesday, April 5, 2011
Spring Wreath fashioned from Recycled Materials

This wreath was made from the scraps left from the weaving I've been doing from recycled shopping bags. Reminiscent of a craft project that was popular many years ago, I have purposely made it a little more shaggy looking, by using different sized and more irregular shaped scraps as the leftover bits and pieces dictated. I did also use a couple of bags that were torn and couldn't be used for my other projects. I made a frame from an old bent wire hanger formed into a circle, and then tied on the bottoms and handle portions that I had cut off from the various bags I was preparing for the loom, scattering the different colored printed sections throughout to give it little color. I then added two types of flowers with leaves, made from the same type of scraps by attaching them together and to the wreath frame with twisties that are used to close bread bags. Since it's made mostly of plastic it can be hung outside in the weather and can be rinsed if soiled.

Tuesday, March 29, 2011
Experimenting with Upcycled Plastic Grocery Bags

I began creating plastic woven material from long strips of plastic grocery bags, and decided to try a small project first to see how well it would work. This is a child's size purse made entirerly from recycled bags and the round plastic top from a milk jug. This type of purse would be safe for a 4 to 5 year old.

The woven plastc material is surprisingly strong, and was created using a 'pot holder' loom. The small size of the loom makes it necesary to make squares that would be fastened together with a crochet-like process, as seen below, to make larger items. This works well for some items, though it leaves open areas that might not contain smaller items and may not support as heavy a weight as the woven area itself.

While designing the child's purse I think I have developed better techniques for attaching the woven squares together, giving the seams much more strength and solidity which I'll try on further projects.

My honey has begun making me a larger hand loom that will enable me to make much larger sheets of the woven plastc material for which I have several ideas for creating different designs and plans for future useful and decorative projects.
Watercolor Tote with Pallet Storage

I've been using this tote for my watercolor tools for a few years. I fashioned it out of an old free canvas tote bag, and the material saved from a broken canvas sling magazine rack. I made a canvas slip-pocket to slide my pallet into, and wrapped two Velcro type straps around it to keep the pallet from sliding out during transport. These were sewn together and then firmly attached to the bottom of the bag as well. It works great for keeping the pallet flat during transport. A fresh or wet pallet can create quite a mess if left tipped sideways between painting sessions. Watercolor paper can be placed on top of the pallet to keep them from getting creased as well. Since the recycled materials were already somewhat soiled, I don't mind that it gets stained with water color paints and I can always throw it in the washer when needed. I do have a nice travel set of watercolors for impromptu painting, but at times I like to have my more extensive supplies along with out dragging along the plein air easel. The watercolor tote works well for art classes or workshops and my supplies are always together, ready to grab on the run.
Friday, March 11, 2011
Preparing Matted Prints for Sale

I purchase photo mats in bulk when on sale to save money, and order those that are delivered in reclosable archival cellophane envelopes so that I can mat the print and then return it to it's clear envelope that the mat was protected in originally. I include a "free" business card (which I order online for just the price of shipping) inside with each matted print, as well as a label showing the title, type of art and artist's signature. The art print itself is stamped with artist's information on the back also. The price label is affixed on the outside, so that the envelope doesn't have to be reopened due to a possible price change.
I keep the titles of my work consistent with the titles I sell online so that they are easy to find if the design is wanted in a different format such as cards, mugs, aprons, etc. My business cards include information on the back as to where the prints are available locally and where different formats and products of the print designs are available for order online.
I keep mats on hand, and can print out an occasional print at home if a special request is made. But I find it is less expensive to order prints in bulk online, as long as you stick with a company that you know consistently provides good quality prints at reasonable charge and then keep track of the prices at each site you use so that you can always purchase them when they are at a reduced sale price.
Thursday, March 3, 2011
ArtfulExpress Blog linked in Examiner.com Article

Photo by RLHall, ArtfulExpress
My upcyled water bottle craft was recently mentioned in the article titled "Crafty uses for fabric scraps, plastic bottles and more" on Examiner.com - Mankato Green Culture
Wednesday, March 2, 2011
Creative Glass ~ Root Starter

Photo by JLTaft
My friend Jan has a cool glass root starter system for plant clippings. With spring coming up, everyone's thoughts are turning toward the warmer weather. When it's still too early to start seeds for outdoors we often turn to our houseplants to fulfill the gardening urge. Getting them ready for the better growing season - repotting, trimming up the tattered growth and pinching back the tips of tendrils to encourage fullness on the main stems. And best of all, starting new plants from those trimmings by first rooting them in water and then planting the newly rooted slips in soil for a whole new potted plant.

Photo by JLTaft
Jan's rooting system not only looks attractive, but saves space as well. She describes it as a set of 'petri-like' dishes, with three pouring spouts on the lip of each dish. Placing a plant clipping in each of the spouts, with the cut end in the dish full of water and the foliage protruding out on the outside, they are then neatly and sturdily stacked on top of each other to create a tower of starting plants.

Photo by JLTaft
The system is called "The Plant Factory" and was made by Corning Glass Works. Since this factory's headquarters is located in my home town, and had changed it's name years ago to Corning Inc. this item must have been made quite some time ago. I have no idea whether they are still being manufactured for sale. A quick google search brought up no results, so they may not be available. Though there may be similar product on the market.

Photo by JLTaft
Since Jan is taking her gardening hobby to a higher level with a greenhouse in the works and plans of offering various types of bedding and potted plants for sale. She needs a convenient way to start some plant's inside until her greenhouse is in working order and the weather has warmed up. This product enables you to add more dishes to each tower and use more towers as needed, providing a compact way to start many new plants at once, and it looks neat and interesting in your home.

Photo by RLHall
My creative root starter is not as sophisticated, efficient or attractive... but it will do, for me... in a pinch!
Sunday, February 27, 2011
Winter Jewels I've Found

'Winter Jewels' by RLHall, ArtfulExpress
Tuesday, February 22, 2011
Changes
One subject...

Two angles...
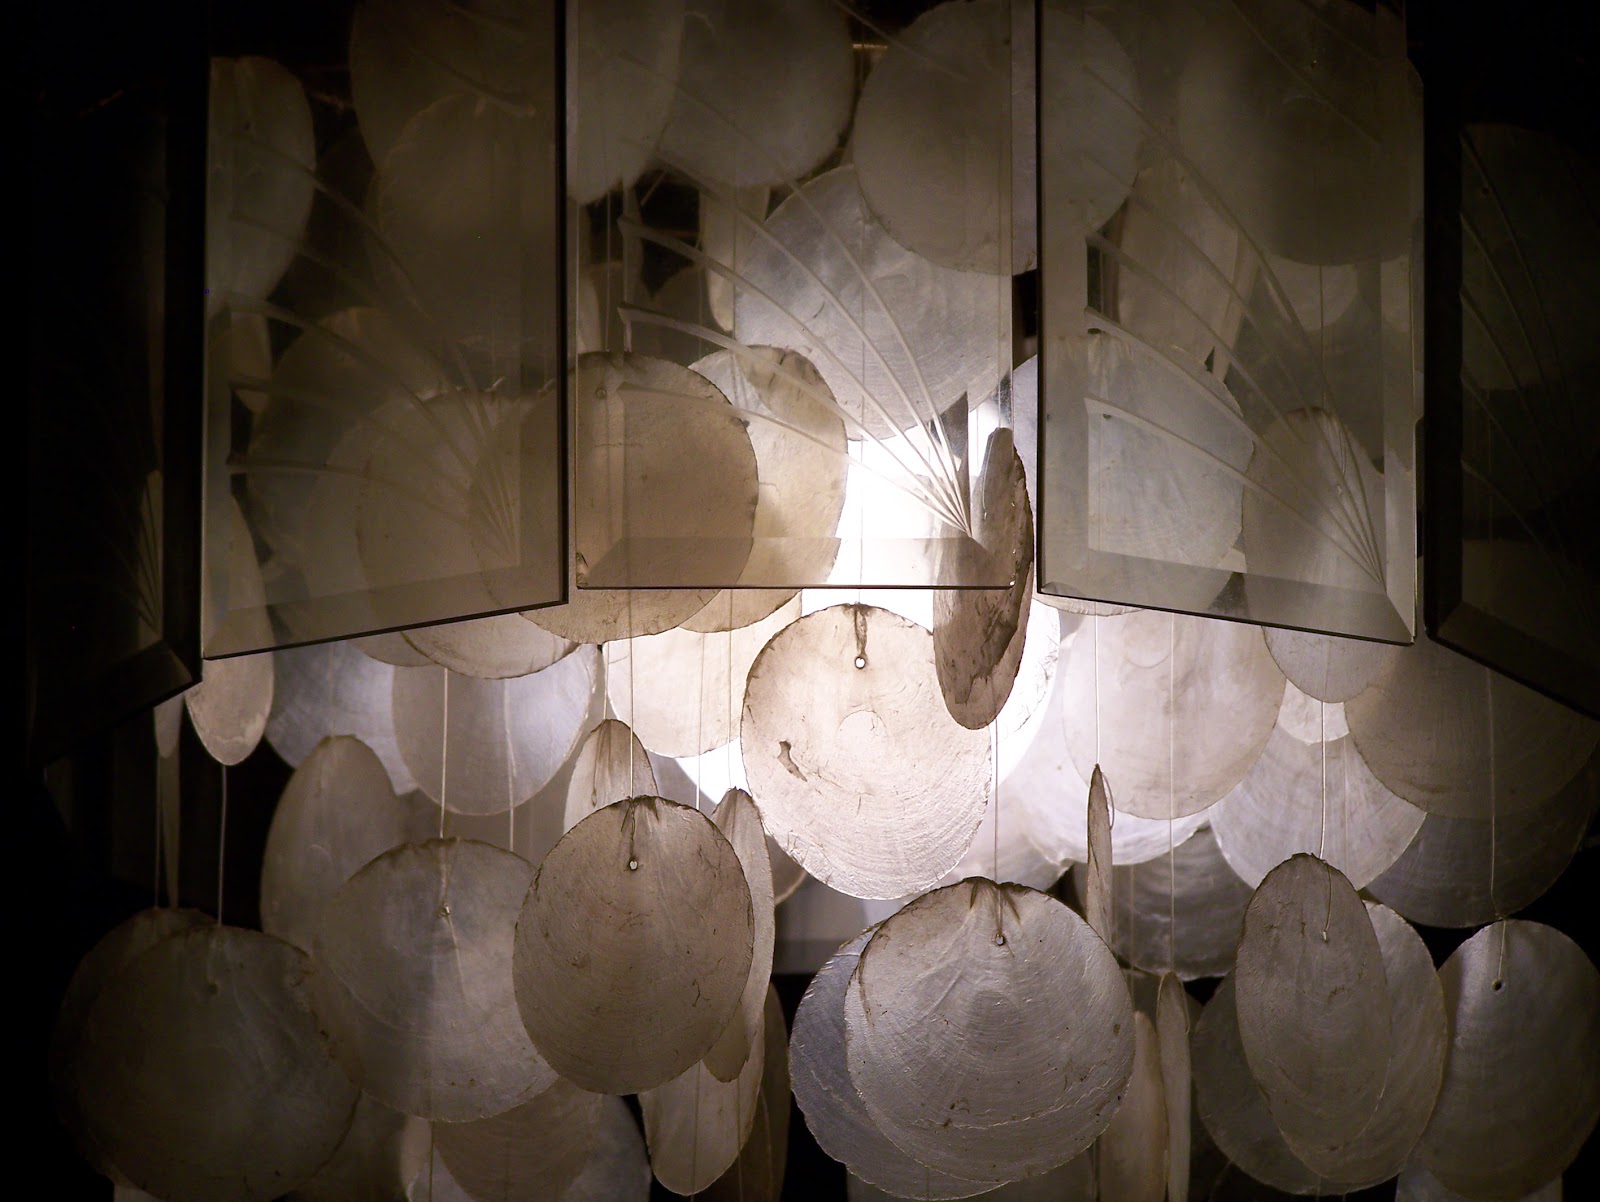

Different lightings...

Colorizations...

Digital manipulations...

Croppings...

Desaturations...

Imagination...

My hand-crafted Conch Shell Chandelier...

The possibilities are endless.
Monday, February 14, 2011
Tropical Themed Hand-Crafted Note Card

Example of my hand-crafted, invitation size, blank note card design.
This card incorporates an Origami shirt made with larger flower or leaf print paper, embellished with a 'Hawaiian Lei' created from narrow strips of a re-purposed plastic grocery bag, gathered with a needle and thread. Creating a card with a popular tropical flair. The layered card stock cover of the card was made by cutting the front a little shorter using fancy cut paper scissors.
This card is great for anyone who lives in, or visits, a tropical climate. Or anyone who wishes they did! It can be used for cute 'Bon Voyage' wishes, or as invitations, place cards or thank you notes for an 'Ocean Cruise' or 'Hawaiin Luau' inspired themed party.
There is enough space on the front of the card, or the under-layer below to add catchy phrases specific to your needs. And plenty of room inside, behind the front flap to write a personalized message.
You can see directions for folding an Origami shirt here.
Monday, January 31, 2011
Hand Crafted Gardener's Note Cards

These EcoArt Note Cards were created from old gardening catalog pages. The flower and leaf is an origami design fashioned from page photos with a saved dried squash seed as it's center, the background is made of a written page from a catalog as well. The main body is card stock, with the decorations constructed with scissors, a paper punch, glue and tape. Entire card is comprised of 90% recycled materials.

My Note Cards are made to fit invitation size envelopes and are left blank inside. I often provide a box of hand made envelopes made from recycled pages and regular plain colored envelopes as well. So that the customer can choose one to go with each card purchased. Since the hand crafted cards are usually from printed materials they make a nice addition to cards handed out personally, whereas the plain cards sometimes work better for mailing. I leave it up to the buyer to choose which they prefer.

A similar design incorporates mixed photo and written word gardening catalog pages in the flower design, which is set against the simple card stock background for a cleaner, less frilly look.
You can find instructions for making basic origami star flowers here. I have expanded on the basic design somewhat, and the appearance can be changed by using different paper patterns and textures.
Wednesday, January 26, 2011
A Display of Family Keepsakes

This antique Cobbler Set belonged to my paternal Grandfather, Thomas Anthony Hall. My Dad brought it home as a remembrance of his father, soon after his death. When I was a young child it was kept near my Dad's workbench in the basement, these smaller tools were stored in the old wooden cigar box that they were found in at Grandpa's house in Pennsylvania. The larger shoe lasts and hammers were kept, along with the cigar box, in a large cardboard box in a metal cabinet where they would be safe. My Dad would sometimes bring them out for me to use when I was working on some childhood project, and used them himself at times. But they were always returned to their special storage place after being utilized. Each time we brought them out Dad would explain how to use each tool I needed and answered the many questions I always had about my Grandparent's lives and what my Father's and his sibling's childhoods were like in that place and time. .
My Grandfather was a Coal Miner, and this cobbler set was used to repair the families shoes, as money for new shoes was often hard to come by. He also fashioned many other useful items from scrap leather to replace worn straps, handles and hinges. And create change purses and small useful items for his young son.
When I was a teenager I wanted to put them on display in the basement game-room, and Dad and I worked together hanging the separate pieces on the wall and arranging the standing shoe lasts beneath them. Now that Dad has passed as well, I decided to create a more protective display for them, while still leaving the more useful tools accessible. By drilling holes in the top of an inexpensive shadow box, I now have the more worn, and smaller delicate pieces encased in glass and the tools that I often make use of are stored safely through the top edge of the wooden shadow box. The other tools are positioned underneath the shadow box and I have incorporated the old cigar box as a small shelf to hold the smaller items. In this way I can keep them all together in remembrance, to admire and use them.

Wednesday, January 19, 2011
Meditation Beads

These hand-strung meditation beads, in bracelet and necklace form, are meant to bring a sense of ritual to daily meditations. Taking them in hand alone, helps prepare for focus, and moving them through your fingers during your practice aids in keeping your mind on your mantra or affirmations. They provide a simple and convenient means for timing sessions as well. The soft wooden beads, will in time, take on a smoothly polished, and familiar feel bringing comfort and personal energy through them as they are utilized. They are delicate and attractive enough to be worn through the day, to remind of the importance of always being present and will be handy whenever the need to become more purposely centered arises. Mostly recycled materials are used in their creation along with meaningful beads, stones, or charms reflecting unique spiritual / religious beliefs or personal interests.
"Praying is asking God for help, meditating is listening for God's answer." ~ Unknown
“If you want to find God, hang out in the space between your thoughts.” ~ Alan Cohen
"Praying is asking God for help, meditating is listening for God's answer." ~ Unknown
“If you want to find God, hang out in the space between your thoughts.” ~ Alan Cohen
Subscribe to:
Posts (Atom)